To see the components that I chose and why, goto here first. also unpacking the system here.
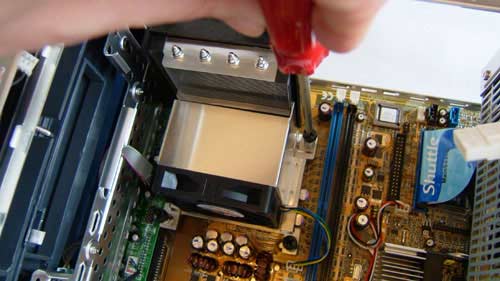 |
For more details see removing cage. Its quite daunting at first, all these things that have to be connected up and if something is wrong it wont work. By undoing 4 screws on the back the cover can be removed. The fan duct can be lifted and removed, I found it quite hard to lift it, I think it must get caught on things so you have to coax it out. Now remove the heat exchanger and fan, I found it easiest to use a screwdriver to do this, I did not notice the bit in the instruction manual about swinging out the side fan. When that is removed we can get at the CPU socket.
|
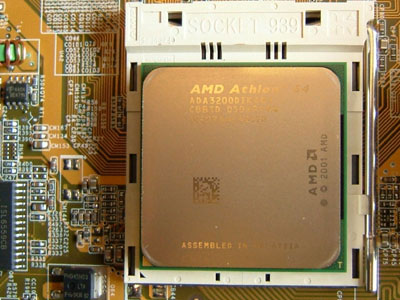 |
For more details see inserting CPU. The leaver on the side of the socket is raised through 90 degrees so that it is vertical, it seems quite stiff. I then removed the CPU from its packing being careful not to touch the pins of discharge any static on the metal parts. I aligned the arrow on the corner of the CPU with the arrow on the socket and to my great relief the CPU just dropped in. Then lower the lever (still quite hard to move). The CPU is now locked in place. |
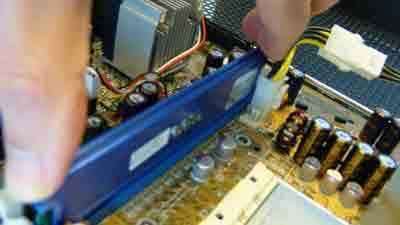 |
For more details see insert Memory. As with the CPU I think its good to avoid touching the metal parts, specially the pins, with fingers. Also be careful to discharge any possible static. The number of pins is different on each side is different, so make sure the memory is the right way round. I opened the white catches at each end, then pushed down on the memory. I'm not sure if I did this correctly, even with quite a lot of force the memory did not go into its socket, then when it did it went in at one end so then I pushed the other end in. I think that I should have used the white catches to provide additional leverage, then perhaps the memory would have gone straight in. Then insert the second memory card into the black socket. |
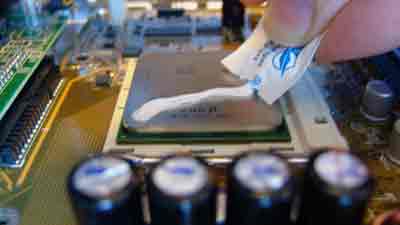 |
For more details see cooling. I used the thermal compound that came with the shuttle. I put a slither along the CPU, then a bit more, then I spread it out. After I did this this site was pointed out to me http://www.arcticsilver.com/arctic_silver_instructions_big2.htm from reading this I suspect I used too much thermal compound. Then put the heatsink fan assembly back. I tightened up the screws using a screwdriver (I'm not sure if this is supposed to be a tool free operation but I found it easier to use a screwdriver) I tried not to overtighten, but its difficult to know how tight it needs to be. Put the fan socket back. Put the fan duct back. Its quite difficult to get all the bits of the fan duct to fit in at once, I had to take some time making sure every thing was lined up before pushing back in. |
 |
For more details see cage and DVD drive. I am only using one hard disc and I am not really sure where the best place to install it is? I decided that it would be cooler if I installed it above the cage so I'm leaving the 3.5 bay free in the cage. Even though I am not installing the hard drive in the cage I put in the HDD shielding, I pushed it down but it still appears to be a bit loose. Fix the optical drive brackets to the DVD drive, they go on the top set of holes. I found it helps to flex the brackets a bit to allow them to fit in without using and force. Then push into the cage, No need to push down the brackets yet. I found it very difficult to know how to set the eject button lever because I cant see both the lever and the button at the same time when inserting the cage into the shuttle. I think it needs to be moved out a bit but I'm not sure. |
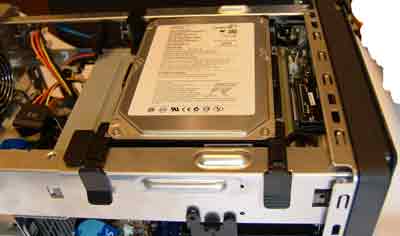 |
For more details see hard drive . I have explained the reasoning for locating the harddisc on the top instead of the cage here. Perhaps it would be better to put the disc at the back as this would next to the rear fans and therefore in a faster airflow, although I'm not sure about this, if it were at the back it might obstruct the airflow, I would like to hear the opinions of more experienced system builders on this. Its quite difficult to lineup the lugs so that they fit in. Then clip in the plastic clips at the other end. Undo the two SATA cables from the plastic cable tie. Plug the cables in, this is quite difficult as the wires push against the metal cage. |
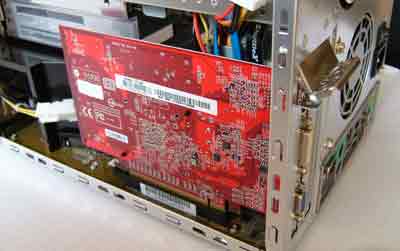 |
For more details see finishing. Remove the warning label. Undo the screws on the two card blanking plates at the back and hinge up the metal plate: Insert the card and push it down into socket. The card seems to pull over to the right, this would mean that the TV out would be blocked, so I had to push it quite hard to the left as far as I could. With the card pushed as far as I could to the left I tightened up screws. I then connected the mains plug, video cable, keyboard and mouse. |
next:
- for more details goto removing cage
- to go on to bios setup see these pages.
